If you’ve ever found yourself waking up on the floor in the middle of the night because of a deflated air mattress, you know the frustration of trying to identify the elusive air leak.
But fear not! In this article, we will uncover the secrets to locating sneaky air leaks that can disrupt your peaceful slumber. So get ready to reclaim your comfy sleep oasis as we guide you through finding air leaks in an air mattress. Say goodbye to restless nights and hello to a fully inflated, cozy bed! Finding air leaks in an air mattress is crucial for maintaining its comfort and functionality.
If you’ve noticed that your air mattress isn’t holding air as well as it used to, don’t worry! There are several simple and effective methods you can use to locate and fix those pesky leaks.
This article will explore various techniques to help you identify air leaks in your air mattress, along with the necessary tools and materials for each method. So, let’s dive in and discover the best ways to find those air leaks!
Review contents
Methods for Finding Air Leaks
Visual Inspection
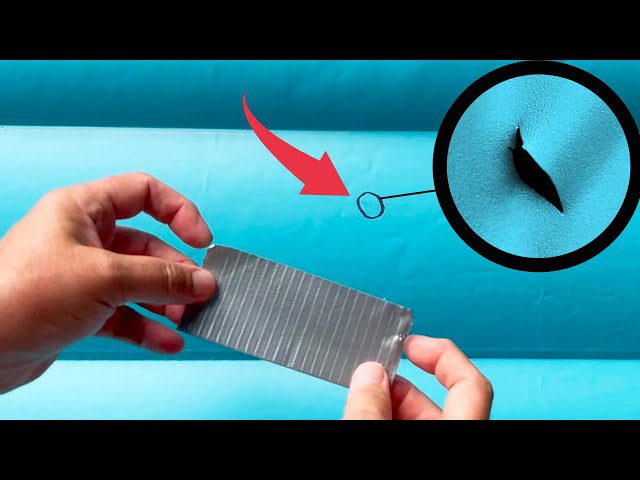
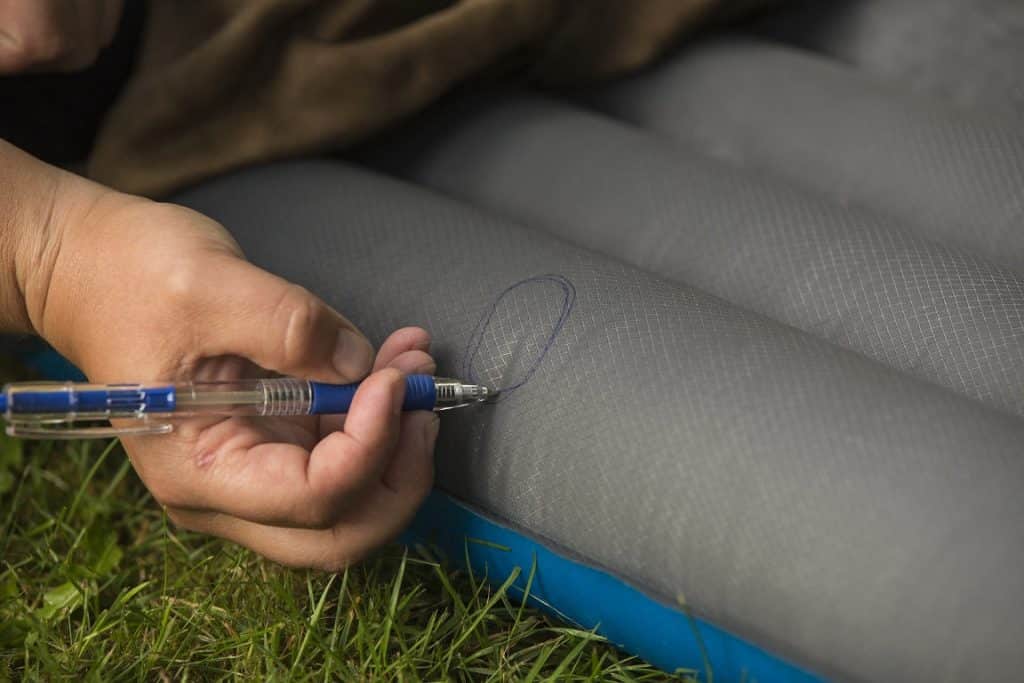
The first method we’ll discuss is a visual inspection. This method involves physically examining the surface of your air mattress for any apparent signs of damage or wear. Look for punctures, tears, or abrasions on the mattress fabric. Additionally, inspect the seams and valves for any signs of leakage. If you spot any visible damage, make a mental note or mark the area to investigate further and repair later.
Soap and Water Test
The soap and water test is widely used for locating air leaks in various inflatable objects, including air mattresses. To conduct this test, you must create a soap and water solution. Mix a small dish soap with water in a bowl or container. Make sure the solution is well-mixed but not too bubbly.
Soap and Water Test: Applying the Solution
Once you’ve prepared the soap and water solution, apply it to your air mattress’s surface. Start by inflating the mattress to its maximum capacity. Then, using a sponge, cloth, or your hands, apply the soap and water solution generously over the entire mattress surface. Be sure to pay extra attention to the seams, valves, and any areas where you suspect leaks may be present.
Submerging in Water
If you can access a bucket or bathtub, try submerging in water. This method is especially effective for locating larger or more stubborn leaks. Fill a bucket or bathtub with enough water to submerge your inflated air mattress fully.
Submerging in Water: Detecting the Leaks
Carefully lower your fully inflated air mattress into the water, ensuring it is completely submerged. Keep an eye out for any bubbles escaping from the mattress. The bubbles will indicate the presence of an air leak. Once you spot a bubble, pinpoint its location on the mattress’s surface. This will help you identify the exact area that needs to be repaired.
Listening for Hissing Sounds
Another method for finding air leaks is by listening to hissing sounds. This method requires a quiet environment, free from any background noise. Inflate the air mattress to its maximum capacity, then place your ear close to the surface, moving it around gradually.
Using a Candle Flame
Using a candle flame can help you detect air movement and, consequently, air leaks in your air mattress. But safety is of utmost importance when using this method. Ensure you are in a well-ventilated area, away from flammable objects or materials. Keep your hair and loose clothing secured to avoid any accidents.
Spray Bottle Test
The spray bottle test is a simple yet effective method for detecting air leaks. Fill a spray bottle with the soap and water solution used in the previous method (soap mixed with water). Shake the bottle well to ensure the solution is mixed correctly.
Spray Bottle Test: Observing for Bubbles
With your mattress fully inflated, spray the soap and water solution generously onto the surface. As you spray, keep a close eye on the mattress, observing for the formation of bubbles. If there is an air leak, the solution will create tiny bubbles pinpointing the leak’s location. Please take note of these areas to address them during the repair process.
Dish Soap Solution Test
Like the soap and water test, the dish soap solution test involves creating a solution using dish soap and water. Mix a small amount of dish soap with water, ensuring a well-mixed but not overly foamy solution.
Dish Soap Solution Test: Applying and Inspecting
After preparing the dish soap solution, you can apply it to the surface of your air mattress. Inflate the mattress to its maximum capacity, and then use a sponge, cloth, or your hands to apply the dish soap solution generously over the entire surface, focusing on seams, valves, and suspected leak areas. Observe closely for any bubbles forming, as they will indicate the presence of air leaks.
Pressure Gauge Test
If you have a pressure gauge, you can use it to monitor the air pressure in your mattress and identify potential leaks. Attach the pressure gauge to the valve of your inflated air mattress and monitor the pressure over a certain period. If you notice a rapid pressure drop, it may indicate an air leak.
Tissue Test
The tissue test is a straightforward method that requires nothing more than a tissue or toilet paper. Choose a quiet location where you can easily access the entire surface of the inflated air mattress.
Tissue Test: Observing for Movement
Inflate the mattress to its maximum capacity and place the tissue or toilet paper on its surface, holding it in place momentarily. Observe the tissue closely for movement or fluttering, indicating air escaping from the mattress through a leak. Mark the area where the movement occurs to facilitate the repair process.
Inflate and Deflate Test
The inflate and deflate test is a quick way to identify air leaks, particularly those that occur during the deflation process. Inflate the air mattress to its maximum capacity and close the valve securely.
Inflate and Deflate Test: Checking for Deflation
Over several hours or overnight, monitor the air pressure in the mattress and check for any signs of deflation. A leak may need to be addressed if you notice a significant loss of air despite properly closing the valve.
Tools and Materials
Now that you’re familiar with various methods for finding air leaks, let’s discuss the tools and materials you’ll need to execute these methods effectively.
Water and Soap Solution
Creating a water and soap solution is necessary for the soap and water test and the spray bottle test. Mix a small amount of dish soap with water, ensuring a well-mixed but not overly foamy solution.
Spray Bottle
A spray bottle is required for the spray bottle test. Fill it with the soap and water solution and shake well to ensure it is mixed correctly. This will allow you to apply the solution evenly over the surface of your air mattress.
Candle
When using the candle flame method, a candle is essential. Remember to prioritize safety when working with an open flame. Ensure proper ventilation and keep flammable objects away to prevent accidents.
Dish Soap
For the dish soap solution test, you’ll need dish soap to create the soap and water solution. Make sure it is mild and suitable for this purpose. Mixing a small amount with water will help identify air leaks effectively.
Bucket or Bathtub
If you opt for submerging in water, you’ll need a large bucket or bathtub to fully submerge your inflated air mattress. Ensure the container is clean and free from any sharp objects or debris.
Tissue or Toilet Paper
To execute the tissue test, you’ll need tissue or toilet paper. This will help you detect air movement and pinpoint the areas where leaks occur.
Pressure Gauge
If you have a pressure gauge, it can be a valuable tool for monitoring air pressure in your air mattress. This will assist you in identifying potential leaks and tracking changes in pressure over time.
Step-by-Step Instructions
To help you navigate the process of finding air leaks, let’s break down each method and provide step-by-step instructions.
Visual Inspection: Physical Examination
- Carefully examine the surface of your air mattress, looking for any visible signs of damage or wear. Pay attention to punctures, tears, abrasions, and areas where the fabric may be weakened.
- Inspect the seams and valves for any signs of leakage or loose connections.
- Take note or mark the areas that require further investigation and repair.
Soap and Water Test: Creating a Solution
- Prepare a soap and water solution by mixing a small amount of dish soap with water in a bowl or container.
- Stir or shake the solution well, ensuring it is properly mixed but not overly foamy.
Soap and Water Test: Applying the Solution
- Inflate your air mattress to its maximum capacity.
- You are applying the soap and water solution generously over the entire mattress surface using a sponge, cloth, or your hands.
- Pay close attention to the seams, valves, and areas where you suspect leaks may be present.
- Observe for the formation of bubbles, which indicate the presence of air leaks.
- Please take note of these areas to address them during the repair process.
Submerging in Water: Preparation
- Fill a bucket or bathtub with enough water to submerge your inflated air mattress fully.
- Ensure the container is clean and free from any sharp objects or debris.
Submerging in Water: Detecting the Leaks
- Carefully lower your fully inflated air mattress into the water, ensuring it is completely submerged.
- Observe any bubbles escaping from the mattress. Bubbles indicate the presence of an air leak.
- Pinpoint the location of the bubble formation on the mattress’s surface to identify the exact area that needs repair.
Listening for Hissing Sounds: Quiet Environment
- Choose a quiet environment free from any background noise or distractions.
- Inflate your air mattress to its maximum capacity.
Listening for Hissing Sounds: Scanning the Mattress
- Place your ear close to the surface of the inflated air mattress, moving it around gradually.
- Listen for any hissing sounds indicating air escaping from the mattress through a leak.
- Mark the area to facilitate the repair process if you detect a hissing sound.
Using a Candle Flame: Ensuring Safety
- Prioritize safety when using a candle flame. Perform this method in a well-ventilated area, away from flammable objects or materials.
- Secure your hair and loose clothing to prevent accidents.
Using a Candle Flame: Checking for Air Movement
- Inflate the air mattress to its maximum capacity.
- Light the candle and hold it near the surface of the inflated mattress, keeping a safe distance.
- Observe the flame for any movement, indicating air movement from a potential leak.
- Please take note of the areas where the flame flickers or moves to address them during the repair process.
Spray Bottle Test: Applying Water and Soap Solution
- Fill a spray bottle with the soap and water solution prepared earlier.
- Shake the bottle well to ensure the solution is mixed correctly.
Spray Bottle Test: Observing for Bubbles
- Inflate your air mattress to its maximum capacity.
- Spray the soap and water solution generously onto the surface of the mattress.
- Observe closely for the formation of bubbles. Bubbles indicate the presence of air leaks.
- Take note of the areas where bubbles appear to facilitate the repair process.
Dish Soap Solution Test: Preparing the Solution
- Mix a small amount of dish soap with water, ensuring a well-mixed but not overly foamy solution.
Dish Soap Solution Test: Applying and Inspecting
- Inflate your air mattress to its maximum capacity.
- Apply the dish soap solution generously over the entire mattress surface, focusing on seams, valves, and suspected leak areas.
- Observe closely for the formation of bubbles, indicating the presence of air leaks.
- Please take note of these areas to address them during the repair process.
Pressure Gauge Test: Attaching the Gauge
- If you have a pressure gauge, attach it securely to the valve of your inflated air mattress.
- Ensure the gauge is calibrated correctly and functioning.
Pressure Gauge Test: Monitoring the Pressure
- Inflate your air mattress to its maximum capacity.
- Monitor the pressure displayed on the gauge over a certain period.
- Please take note of any rapid pressure drops, as they may indicate the presence of an air leak.
Tissue Test: Choosing a Location
- Choose a quiet location where you can easily access the entire surface of the inflated air mattress.
- Inflate the mattress to its maximum capacity.
Tissue Test: Observing for Movement
- Place a tissue or toilet paper on the surface of the inflated air mattress, holding it in place for a moment.
- Observe the tissue closely for any movement or fluttering.
- Movement indicates air escaping from the mattress through a leak.
- Mark the area where the movement occurs to facilitate the repair process.
Inflate and Deflate Test: Inflating the Mattress
- Inflate your air mattress to its maximum capacity.
- Close the valve securely to prevent any air from escaping.
Inflate and Deflate Test: Checking for Deflation
- Monitor the air pressure in the mattress over several hours or overnight.
- Check for any signs of deflation, such as a significant air loss, despite properly closing the valve.
- If deflation occurs, a leak may need to be addressed during the repair process.
By following these step-by-step instructions, you’ll be well-equipped to identify and locate air leaks in your air mattress. Remember to exercise caution when using open flames and prioritize safety. Once you’ve identified the leaks, you can proceed with the appropriate repairs to ensure your air mattress is as good as new! Happy mattress hunting!
